Thursday, December 30, 2010

Nuts About...Nuts!


I really love nuts. I definitely understand what the big deal is regarding food allergies, but it saddens me that I can't send my son to school with a good old fashion PB&J (and while I do share an affinity for sunbutter, please don't even try to convince me that it's "just like peanut butter").

We try not to overindulge in nuts too much here. Despite the fact that they have lots of excellent nutritional benefits (essentially fatty acids, rich in protein, fiber & folate, etc...) they are also high in fat, so we do our best to reign in our penchant for them. However, since the holidays rolled around, I could think of nothing better than whipping up a batch of spiced mixed nuts.

They're easy, delicious and a great departure from all the baked goods that find their way into my house around the holidays. I never use the same recipe twice, and find myself combining a few different recipes  into one that works for me. My inspiration for this batch came from a crazy combination of Emeril, Martha Stewart & Whole Foods.

I started off with a variety of nuts: Pecans (my favorite!), walnuts, almonds, filberts, and cashews. All of them were raw to begin with. I used a total of 8 cups of nuts total - breaking them up into two batches. Then I gathered my spices:

I went with brown sugar, cinnamon, cayenne pepper, salt, chili powder & some cumin(not pictured).

For each batch, I whipped up a couple of egg whites until they were white and frothy, then added the nuts to them.


Once the nuts were all coated and glistening, I coated them in my spice mix. Now, if you're looking for exact measurements, you're not going to find them. The best part about making spiced nuts is that you can always change up how you make them.

I'll do my best to give you the approximation, however. I went with a generous 1/2 cup of brown sugar, 3 teaspoons cinnamon, 2 teaspoons chili powder, 1.5 teaspoons of cumin, 1/2 teaspoon of cayenne, and 3 teaspoons of salt.

Spiced nuts - pre baking

Preheat your oven to 300* and then bake for about 45-50 minutes. It is crucial that you keep an eye on the nuts and stir them every 10 minutes or so (more towards the end). You really don't want these to burn, and they can do so quickly, especially as they finish up.

Spiced nuts - done!

Let them cool off for a bit before you do anything with them. I still make the mistake of trying to taste them right when they get out and end up with a scalded tongue each time. But, it's really hard to resist when they come out smelling so fantastic.


I ended up packing them up in some Ball jars and have been giving them out as holiday treats to friends and family. These spiced nuts really are incredibly easy and fun to experiment with. I've found that unless you burn them, it's hard for them to not come out well. So, if you try these out, enjoy!

Do you have any favorite holiday-esque foods that you make/give/receive?

Tuesday, December 28, 2010

Neither Rain, nor Sleet, nor Snow...

Despite the so-called "Snowpacolypse" that fell upon us here in New England, there was no amount of bad weather that could keep us from our weekly Monday ritual!

Don't get me wrong, it was quite snowy...

But we weren't going to let it ruin our Monday night fun! However, with it being the Monday after a holiday weekend, it was slim pickings around here. Most folks were away visiting family, so it ended up being a small, cozy potluck - which sometimes, is absolutely perfect.

We ended up making some baked cheesy shells. I used my standard go to mac & cheese recipe (This is my base recipe, sans the spice). I used some "Seriously Sharp" cheddar and added a touch of smoked paprika and mustard to the cheese sauce. We arrived at potluck with a still steaming hot dish, and it was gobbled up within minutes, despite the small crowd.


After we ate, the kids gathered around to decorate some delicious ginger-sugar cookies that Angie and her crew had made earlier in the day.


Being able to slather on frosting, and the top the cookies with a number of tasty treats made this dessert a big win. The adults sipped on Kahlua-laced homemade chai tea while the kids went to town.

One of the kid-decorated cookies - frosting, shredded coconuts, chocolate chips & flax seeds!

Despite the fact that it ended up being a small, 3-family potluck, we all had a ton of fun, and it still felt as rambunctious and joyful as ever. It was nice to get out of the house (albeit, carefully - as not all the streets were well plowed!) and share a warm meal with friends.

Monday, December 27, 2010

Easy as 1...2...3 (...4...5!)

A couple of years ago I got into baking homemade bread. After stumbling across this book

...I found myself trying all sorts of new and delicious types of artisan bread. Bread in 5 minutes a day? I'm sold! The process really is as quick and easy as the book title purports and while I tend to take a break during the warmer months, once winter hits we're back in the kitchen mixing together some dough.

This past weekend seemed like a great time to whip up a batch, so I enlisted my favorite sous-chef and we went to work. Okay, I'll be honest...he went to work. That's how easy the basic artisan bread is.
All the ingredients to the "Master Recipe" for the basic boule.
Yup, that's it. Four ingredients: flour, lukewarm water, salt & yeast. I halved the actual recipe, so I only ended up with enough dough to make 2 large loaves. The actual recipe can yield up to 4-5 loaves.


Start with 1.5 cups of lukewarm water. We dump it right into our Kitchen Aid. The best part of this recipe? No kneading!!

In goes the yeast and then salt
Add 3/4 of a tablespoon of yeast and 3/4 of a tablespoon of salt to the lukewarm water. I don't have a "3/4 tablespoon," so I always just eyeball it whenever I halve the recipe, and so far it hasn't steered me wrong.

Mix the water, yeast & salt all together
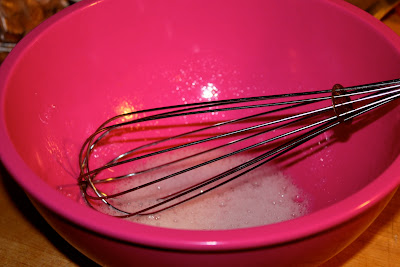
We use a whisk to mix the 1st three ingredients together to make sure that the yeast fully dissolves. Then...it's flour time!


We pre-measure the flour into a bowl for easy pouring. Add 3.25 cups of white flour into the Kitchen Aid (make sure it's fitted with a dough hook!).

 Work the dough until all the flour is mixed in. It will look wet and lumpy, but that's fine - promise!
Bread dough
 Now you...wait. I just leave the dough in the Kitchen Aid bowl, cover it loosely (I have a large plastic top that fits well) and allow it to rise for 2-3 hours.

Risen!
After the initial rise you have a few options. You can fridge it (it lasts about a week in the fridge) or work with it right away. I always fridge it, since it's easier to work with after it's been chilled.

When you're ready for some bread, take a grapefruit size chunk from the dough (I just tear it off with a floured hand) and place it on a floured pizza peel. Trying not to knead it too much, shape it a bit until it's round and somewhat smooth.


Then let it sit out for 40 minutes.

Preheat your oven to 450* with a pizza stone set inside. You should let the pizza stone get really hot, sitting in the oven for at least 20 minutes at 450*.  When I put my pizza stone in to preheat, I also put in a broiling pan from my toaster.

Once the bread has rested for 40 minutes, cut a few lines into it to allow air to escape. We usually just do three straight lines, but you can get fancy and try to carve an initial or a smiley face. Then, slide the dough onto the prepared pizza stone. Before closing the oven, add a cup of water into the broiling pan. The steam helps with some part of the cooking, but I've never figured out exactly what.

Bake for 1/2 and hour and...


Fresh bread! Your kitchen will smell phenomenal, you'll be surprised at how little work you actually did (even less if you have a helper!) and you'll be able to sit down and enjoy a piece of hot, delicious bread. We go simple with our fresh bread, either using it to sop up soup or spread just a little bit of butter on it.

The actual book has a bunch of other fabulous bread recipes to tackle once you've mastered the "Master Recipe." We've tried a few and have been happy with all of them.

Friday, December 24, 2010

Happy Holidays!

Popping in to wish everyone a warm and happy holiday season. Since we don't celebrate Christmas, we'll be doing our part to support the local Asian food scene with a hibatchi dinner tomorrow! Perhaps a movie will even be involved.

I love the goodwill and cheer spread this time of year, and will also be spending tomorrow roasting and seasoning various nuts to make little packages for our friends. Swapping food-centric gifts with friends seems to have become somewhat of a tradition (I can still taste Megan's homemade marshmallows from last year, mmm!).  This year is no exception and we've already received some delicious treats.

I'll leave you with a peek at two of them, with promises of a roasted nut write up sometime in the near future!

Homemade peppermint chocolate bark from Katie
 This jar has pretty much already been demolished. The hit of peppermint cuts through the white and dark chocolate perfectly and one chunk totally hits the spot after dinner (although we never quite stop at just one...)

Chocolate/peanut butter balls from Megan
These are totally melt in your mouth (and your hand!) and are already gone. Chocolate and peanut butter is definitely a favored combo here.

Wishing everyone happy holidays...may they be filled with love, laughter and lots of delicious food!

Wednesday, December 22, 2010

Chile Tortilla Eggbake

I mention chiles, cheese, eggs and tortillas and everyone wants the recipe! It's no surprise, considering most of us at potluck also wanted the recipe to the chile tortilla eggbake that Katie made. She was kind enough to share the recipe with us, and now I'm sharing it with all of you.
Picture from Catherine Newman's blog. We ate Katie's dish too fast - no time for a photo!

The recipe comes from blogger Catherine Newman, and you can find more about it here. It looks easy enough and I'm pretty certain I'll be trying my own hand at it soon. (I've included an edited version of the recipe here. Check out Catherine's blog for the longer version!)
Chile Tortilla Eggbake
Serves 8
Active time: 10 minutes; total time, 10 minutes + overnight + 45 minutes
6 flour tortillas, soft-taco size                                                                                                           
3-4 small cans of chopped green chiles, drained and rinsed in a sieve                                   
1 pound grated cheese                                                                                                             
5 eggs, beaten
2 cups milk                                                                                                                               
1 teaspoon kosher salt 

Grease a 9- by 13-inch baking dish.


Cover the bottom of the dish with tortillas overlapping as little as possible. You will use 2 tortillas per layer: Sprinkle the tortillas with 1/2 of the chiles and 1/3 of the cheese, then add another layer of tortillas and top it with the rest of the chiles and another 1/3 of the cheese. Add the final layer of tortillas, sprinkle it with the remaining cheese, and then whisk together the eggs, milk, and salt in a bowl, and pour this over the whole casserole.


Cover and refrigerate overnight.


In the morning, heat the oven to 350 and get the casserole out of the fridge. Let come to room temperature. Bake for 35 minutes, if you remembered to let it warm up a little first--and more like 45-50, if you put it in cold. When done it will be gloriously browned around the edges, and it will jiggle not at all or just the tiniest bit in the center when you, um, jiggle it.


Let it sit 5 or 10 minutes before cutting it, so that it has time to set up. If you cut into it, and it's very obviously not cooked through, then pop it back into the oven for 10 more minutes.

As we sat around eating the eggbake we all mused about what other dishes we would make in an ideal meal with it.  For starters, we all agreed that the eggbake would be the perfect brunch food. Some thought that various pork products would compliment it well, and I went out on a limb suggested that fruit salad would be a nice light side. Either way, there was universal appeal to the idea that a mimosa would be an excellent drink accompaniment.

With new years eve on the horizon, I'm always looking for something new to try and this looks like something easy I can make the night before and wake up in 2011 with nothing more to do than pop it in the oven and start mixing the orange juice and champagne!

Tuesday, December 21, 2010

Solstice Potluck

It's so wonderful when potluck just slides into place. Some weeks I feel like we're all scrambling around, trying to find somebody to host, uncertain of what we'll be bringing or otherwise feeling rushed and frazzled.

I always fear that those Mondays will creep in, especially around the holidays, when everybody already seems to have a little extra on their plates. Thankfully, none of that seemed to be present at all last night as we gathered at my house for a lovely Solstice potluck.

We went the simple but tasty route...making a fresh green salad dotted with orange and yellow peppers, grape tomatoes and baby cucumbers, and my standby dressing was whipped up in a flash (red wine vinegar, olive oil, freshly chopped garlic & spicy mustard).

My husband decided to be in charge of the mashed potatoes, since I'll admit his always come out fluffier than my own. It's probably the extra butter or cream he uses. Or perhaps its the extra flick of his wrist as he whips them with a hand beater. Either way, they came out melt-in-your-mouth perfect.
My friends Rachel and Andreas traveled out from their residence at EarthDance earlier in the afternoon, bringing with them some bounty from the Berkshires.
Some of the biggest winter veggies I have ever seen!
We decided to roast some of the root veggies up in addition to the salad and mashed potatoes.
A little olive oil, some thyme & rosemary and finished off with some red wine vinegar when they came out of the oven!

All of these dishes went well with the rest of the meal... Folks brought stewed lentils with a hint of vinegar(which were great served over the mashed potatoes), savory mushrooms, split pea soup, a tasty green chile/egg/tortilla bake, various cheeses/crackers/meats, and some light and fluffy almond cake for dessert.

In the past, we've usually prepared a holiday feast for potluck around the solstice, bringing warm winter dishes to fill our bellies and souls. We also do a "Secret Solstice" gift swap, presenting gifts to each other. We didn't prepare for either this year, so it was with great pleasure that we ended up having such a delicious holiday meal. (As for our gift exchange, we decided to move it up a few weeks and will be exchanging them the first potluck of the new year!)

Tuesday, December 14, 2010

Two Birds...One Soup (aka Soup-a-Long: Week #4)

In addition to missing potluck while we were away, I also actually missed cooking! Sure it was nice having others cook for me, but there was some small part of me that itched to get back into the kitchen and play around with food. 

Thankfully, I was able to stretch those cooking muscles yesterday as I prepared for potluck. Not only was I making a meal to share with my friends, but I also decided to jump back into the soup-a-long since I missed last week. 

One great thing about making soup for potluck is that you know there's always going to be enough. Soup is one of those magical dishes that always seems to have an extra bowl left. Also, making this one on a Monday ensured just enough extra for lunch for me today - win/win! 

This week's soup happens to be one of my favorites, yet one that I've never actually made myself before: Tortilla Soup! 
Now that I've made it, I can reassure you that it will quickly become a staple in this house. It was easy, delicious and a big hit with kids and adults alike.

Most of the ingredients ready to go!
This week's soup comes courtesy of my friend Jess's mom. My own comments are in green!:
SPICY TORTILLA SOUP 


1 large onion, coarsely chopped 
2 tablespoons vegetable oil 
4 corn tortillas, coarsely chopped 
6 cloves garlic, minced 
1 tablespoon chopped fresh cilantro 
2 (10 3/4-ounce) cans tomato puree (I used one large 28oz can)
2 quarts chicken broth 
1 Tablespoon ground cumin 
2 teaspoons chili powder 
2 bay leaves 
1/8 teaspoon ground red pepper (You know me and my fear of spice, so I omitted this, but added a bit more chili powder, cumin & some salt)
3 corn tortillas 
2 skinned and boned chicken breast halves, cut in 
strips 
1 avocado, peeled, seeded and cubed 
1 cup shredded Cheddar cheese 
                  ***
Position knife blade in food processor bowl; add 
chopped onion, and process until smooth. Measure 1 
cup onion puree, and set aside; reserve any remaining 
puree for another use. (I always just use all of it) (I'm not sure what it was, but my onion just did not puree all the way. I kept using a spatula to get it close to the blade and re-pulsing it and... nada. I used it anyway and I don't think it made a difference...it just wasn't a "puree")
Heat 3 tablespoons vegetable oil in a Dutch oven over 
medium heat; cook 4 chopped tortillas, garlic,and 
cilantro until tortillas are soft.
This smelled pretty fantastic.

Add onion puree, and next 5 ingredients. Bring to a boil; cover, reduce heat, and simmer 30 minutes. Remove and 
discard bay leaves. (This soup couldn't have been easier if it tried)
Cut 3 corn tortillas into thin strips. Pour oil to 
depth on 1 inch into a large heavy skillet. Fry 
strips in hot oil until browned.
I really should have made more of these. So tasty to snack on.
          Remove tortillas and all but 1/2 tablespoon oil; drain tortillas on
paper towels and set aside. Add chicken to skillet 
and cook until done (about 10 minutes). (I actually cut the chicken into strips and added it to the soup once it boiled - before i turned it down to a simmer. That way there's less oil involved and the chicken was cooked perfectly, coming out juicy and flavorful.)
Spoon soup into bowls--add chicken, cheese and 
avocado. Top with tortilla strips. (I serve those 
things in bowls for People to add themselves along 
with more cilantro and sour cream). I also use the 
large can of tomato puree which I think may be more 
than called for. 

Yum!

Since I brought the soup to potluck, I made sure to bring a bunch of yummy toppings. A large brick of cheddar, two avocados and some extra cilantro came with us and people were able to choose what type of toppings they wanted. I quickly learned that tortilla soup is really just a delicious vehicle for yummy add ons. I may have gone back for an extra chunk of cheese or some more crispy tortilla strips more than once.

Everyone enjoyed this soup, including the kids. The spice level was perfect, but I could see it also being tasty with just a bit more of a kick. I will most definitely be making this soup a few times this winter - it's the perfect way to warm up on a chilly night when you're looking for a little something different.

Monday, December 13, 2010

Disney Dinners

You may have noticed a slight lapse in blog posts over the last week or so. The main reason was because we were away on a family trip down in Florida and our access to internet was spotty. The other reason is that there was little in the way of food for me to write about.

Yes, I could have written post after post about how sad I was that we were missing potluck and our friends and *good* food, but nobody really wants to hear me whine, do they?

Instead, I'll apologize for the lack of posts and just get on with the show. As part of our vacation, we spent three days at Disney World. I had mixed feelings about going...most having to do with buying in to the mega marketing corporation that is Disney, but at the same time I had those nostalgic feelings of whimsy and magic that only Disney can produce. 

The little one, enjoying an ice cream Mickey head.
We had gotten a Disney meal plan as part of our vacation package, and while it was a little stifling (you only got a certain number of certain types of meals each day), overall it worked out well for us. 

The actual meals we ate ranged from incredibly delicious to non appetizing. But, just like in any place, there are bound to be places that wow you, while others don't even merit a second chance. I wasn't expecting the "quick service" meals to b dazzling, and they lived up to those expectations. They were fine and fueled us sufficiently to continue on our busy day of going on rides and viewing parades.

I'll spare you the details of the less than satisfying places, and instead focus on what we did like. Our second night there we ventured into Epcot, a favorite park of ours, and dined at La Hacienda de San Angel...a Mexican themed restaurant right on the water. 

After a day of less than stellar food (lunch was a bland burger and greasy fries), I was more than happy to dine on delicious tilapia covered with fresh queso, over roasted vegetables. 
I need a new camera phone. Clearly. 

The fish was cooked perfectly and all the flavors melded together for an enjoyable meal. This was definitely my favorite meal I ate while at Disney. I was almost too stuffed for dessert. Almost.

Mmm...churros & dulce de leche ice cream

The next night we floundered around a bit for a place to eat, until finally ending up at Wolfgang Puck's restaurant in Downtown Disney. I was excited to eat there, as I've always admired him and his food. There was an array of food to choose from, and while I really wanted to try some pizza, I settled upon the macadamia nut encrusted chicken.
It came along with some red papaya marmalade
The chicken was incredibly tender and juicy, but it was also super salty. I was actually shocked at how salty it was, and wondered if somebody had a little slip of the wrist while cooking. Thankfully the papaya marmalade helped mellow out the saltiness and I enjoyed the meal for the most part.

And now? Now we're back home and I'm preparing to gear up for a night of fun with friends and food. 

It's Monday and there's potluck to cook for. (I'm thinking of going with tortilla soup...)